

December 25, 2013
December 19, 2013
Ikea Hack #3: bar stools painted.
This will be another post of my ikea bar stool series, so lay back and enjoy the "ride". About a month ago I have repainted cushions on my ikea bar stools and I have not stopped there, I decided to add even more color to my dining / living area. 


 Photos show slightly brighter color then it is in reality.
This one was error and trial, I wanted to give a try for chalk paint, I made another batch of my own, some paint from Lowes and got to painting my bar stools, once one stool had couple of coats of paint, I decided that the the paint was just to bright.
Almost forgot to mention that I did not sand the piece because I wanted to see if the paint will adhere, but I was wrong. Once it dried paint could be easily scratched off. I had to start the process all over again, but this time I have used spray primer. Put the chairs together to see if I like the white look: Nahhh.
Then I went back to store and got a sample paint but in much darker yellow almost orange, mixed with my old yellow and results came out beautifly.
I think for now I am satisfied with the look and will keep these chairs untouched for a while :)
December 11, 2013
IKEA Hack #2: barstools painted cushion
***disclaimer: please excuse my phone quality photos***

For this post I have something interesting to share with you.
As time passed I got really bored with the pattern that I chose in the beginning, I have no idea what was I thinking by choosing that granny pattern. This time around I was not really up to reupholstering stools again, that's where the idea came to paint the cushions.
I made batch of my own chalk paint, and after 3 coats of paint(I've sanded in between each coat) Now my barstools look soo much better. If you are wondering about cushions being crunchy: for this step I used wax. Once my final coat of paint dried, I waxed and buffed cushions, now it feels like leather. It has been a month since I've painted them, they are really steardy and so easy to clean, specially after my sons painting/drawing sessions. Just wipe cushions with a damp cloth, and you are good to go.

Another Before and After

Here's all of them together:

P.S. Sometimes in the near future I will post step by step how I did my turquoise canvas in dining area.
December 7, 2013
Chalkboard picture frames
The recipe is quite simple:
- half a cup of acrylic paint (color of your choice)
- 1 tablespoon of Plaster of Paris.
- mix everything very well
Original recipe asks for I non sanded grout, I didn't have that on hand and decided to experiment with Plaster of Paris. The results came out beautifully. We had invited over my neighbor and her kiddos, and went for it. For this project we have used couple of old picture frames and a box from chocolate candy.
Here are results.
Enjoy :)

September 18, 2013
Old Desk Revived
Sometimes in December I came across Craigslist free post, it was a little black desk perfect for my son's room. It had stickers all over from different music bands. Once I saw this "beauty" I knew I had to have it. Lucky me who has in-laws with Suburban, dad gave me ride to Portland downtown so we could bring this baby home. (this is craigslist photo)

Once I brought it home my dear hubster was put to work to help me on this one. If you ever try to revive old furniture like I have tried, you might learn thing or two that have worked for me with this project.

First Step was to get the stickers off which were pretty stuck on the surface of the desk, for that I used drywall spackle knife.

Then the paint strip came in.
Please make sure that you have proper clothing worn to avoid risk of burns.

Get a cheap brush and brush away,

after 20 minutes get a drywall spackle knife and get scraping : )


Turned out that this desk had 3 different layers of paint plus stain. The results came out like this.


Another step: Sanding. At first I have used #60 sanding paper and then #120. Below you can see the results, it turned out not that bad. I had to work around the little corners with sponge sander to make sure that all of the old paint was gone. Make sure when you do all of this work you have a mask on, to protect yourself from old paint that might have led in it.

Next Step was to prime it, and as usual I have turned to my all to go Zinsser Cover Stain White Primer. This works as a sealer, primer that covers really well ALL kinds of surface, which includes leminates. I recommend using just a regular cheap foam brush so you can throw it away once you are done.


Once the primer has cured I sanded it in between coats (I have added two of them) I recommend allowing the drying time at least a day. Then I used two sanding papers 80 and 200 to get that smooth finish.

Then My little drawers came in, I decided to use blue paint left overs from Timmy's Old room (that we have painted back in California)

to get a little blue border as my little design I have used painters tape. I am a newb at this, so I have painted drawers with blue paint then covered with painters tape and added gray paint (again left overs of paint from my master bedroom)


and that's how the drawers will look after you peel the tape off


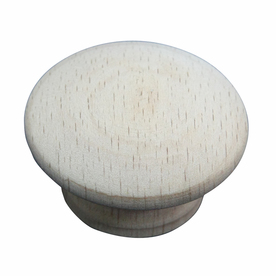
I had to replace old hardware, so I actually asked my son what he wanted. He chose the simple and round ones. You can get these at Lowes and they come in pair. I believe the cost is about $1.59. I decided to go with a blue color as well.
I've used same gray paint as for drawers for the main base of the desk.

After 3 coats of paint this is how it looked before I've added clear seal.

After the paint cured which was about a week I've sprayed with a clear sealer by Valspar and allowed it to dry for 3 days.
.JPG)
And here she is in my son's room. I liked it, but to me it seemed like something still was missing...
(please excuse my iphone quality photos)

After going through hubbys things I have found box of maps that he had collected over the years. I decided to go with Canada map.

Then measuring and cutting came in, yes I had to include a photo of me : )
(ignore our little Oreo peeking)


I've seen a lot of cute mod-podge projects on pintrest and decided to visit Joann's. What do you know lucky me, that week they had their 50% coupon out.

This step needed little persistence because map was made of regular paper and I wanted to avoid bubbles as much as I could. First I added layer of mod podge on the top of the drawer directly and then on the paper. As I have suspected there were a lot of bubbles. I took just a regular ruler and smoothed them out carefully. Then I've added another layer of the glue on top of the image. Total was 3 layers of mod podge, about 15 minutes of drying in between the coats. Once the glue dried I sprayed it with Valspar clear spray total of 3 coats, also allowing to dry in between coats. I recommend leaving something like this outside for few hours because the smell is pretty strong.

Next step was to put the drawer pulls back on.
.JPG)
And here's she is in its full glory...

and from a side...
.JPG)
and this one just for fun : )
.JPG)
This is just a reminder of how it look before

Here's breakdown of all the tools that I've used with this project:
1. Paint Sripper
- cheap brush
2. Drywall Knife
3. Electric Sander
3. Sanding Paper
4. Sanding Block
5. Purdy Brush (they are the best)
6. Zinsser Cover Stain White Primer
7. Cheap Foam brush
8. Paint of your choice
9. Painter's Tape
10. Valspar Clear Sealer (Gloss)
11. Mod-Podge
12. Pair of Sissors
13. Measuring Tape or Ruler.
Hope you have enjoyed the post!
March 26, 2013
Barstools reupholstered, Ikea hack.
If you remember a while back I found ikea barstools on Craigslist, I decided that it is was time for them to get some cushions. I enjoyed this project a lot because it is something that can be done in one evening. Good thing I had some foam pads, got them for free a while back and now found a perfect opportunity to use them. For this project I used just a regular stapler that I got a while back from Walmart, I believe the cost was under $10. If you are doing little projects, this one is just perfect and budget friendly.
Enjoy before and after results.


Enjoy before and after results.
March 24, 2013
Rug on the budget
A while back I came across these square carpet tiles for my dining area, see my living and dining space is just one room and there was not a lot of it. I wanted some kind of carpet to separate the two, but didn't want to buy something that looks like rectangle. So I looked and looked for a perfect square and had no luck and then I found these perfect square carpet tiles (1sq ft x 1sq ft) I bought nine of them and put them together. These are perfect for the areas that have tile or hardwood flooring. The idea is that you put them one by one and thanks to their rubber back they won't slide. But in my case I have carpet all around the house (that's what you get for renting) so what I did with them was to gathered the carpet tiles together and on the back secure it with duct tape. After a while the carpet tiles shifted and it was not pretty, and to fix the problem I used hot glue to keep the peaces together plus duct tape just to secure that hold. The grand finale was to paint the trim with nice and bright color.
Now my dining and living areas are tied to each other because of the colors. This was one of the simplest project that I have done do far. Enjoy before and after!


Now my dining and living areas are tied to each other because of the colors. This was one of the simplest project that I have done do far. Enjoy before and after!
March 23, 2013
Out with the Old, in with the New
Recently I came across this freebie lamp, it was old, rusty and musty (hey, I rhyme) First thing first, washed it with soap, then added some life to the shade with burlap fabric (it was a freebie as well) the trim I had was ivory color, perfect match to the fabric. Then I took the lamp to the garage for light spray paint. At first I added primer (Valspar spray primer) after that dried which was fairly quick I added few coats of Krylon yellow spray paint. I decided to keep the lamp on changing table, as it nicely matches with yellow accents for the baby. Here are my results, Enjoy!


January 30, 2013
It has been a while...
It has been a while since I posted anything on my blog, but that doesn't mean that there was no progress done in my little "studio". With tiny baby on my hands I can barely get things done around the house let alone squeeze time for my little projects. The only time I get to paint is at night when baby is a sleep with hubby.... Yes I know it's time for her to sleep by herself, I admit we are still co-sleeping (she wakes up every 2-3 hours to eat)
Stay tune for few reveals that should be posted next week: 2 ikea dressers/night stands, Timmy's desk (these are almost finished)

these are drawers from Timmy's Desk painted and ready to go

In future posts I'll try to share with few tips of painting furniture that have worked for me as a beginner.
Subscribe to:
Posts (Atom)